Thursday 28 February 2013

SoBH Campaign 3 - Battle 10

Battlefield: Beacon Hill
Weather: Calm
Scenario: Silence The Watchtower.
Defender: Barbarians

Forces:
New additions marked in purple italics

Dwarves (568 pts):
  • Valgen Maest: DWARF COMMANDER 103 Pts, XP: 2 , Quality 3+ Combat 4
    [Brain Damaged: Worse Quality ],Short Move, Leader, Fearless, Free Disengage, Shieldwall, Snow Walk
  • Falster Vonlyr: ELITE WARRIOR 65 Pts, XP: 2,  Quality 2+ Combat 4
    Short Move, Steadfast, Fearless, Free Disengage, Shieldwall
  • Halgar Snowbeard: ELITE WARRIOR 50 Pts, XP: 2, Quality 3+ Combat 4
    Short Move, Opportunistic, Snow Walk, Shieldwall
  • Ireheart: ELITE WARRIOR 40 Pts XP: 2, Quality 3+ Combat 4
    Quality 3+, Combat 4, Short Move, Lethal (vs Barbarians)
  • Manon Hardfoot: WARRIOR 48 Pts, XP: 1, Quality 3+ Combat 4
    Short Move, Shieldwall, Snowwalk
  • Rod Grimiron: WARRIOR 48 Pts, XP: 1,  Quality 3+ Combat 4
    Short Move, Shieldwall, Snowwalk
  • Hono Pickbattler: WARRIOR 48 Pts, XP: 1,  Quality 3+ Combat 4
    Short Move, Shieldwall, Snowwalk
  • Odel Bowtwanger: CROSSBOWMAN 32 Pts, XP: 0, Quality 3+ Combat 3
    Short Move, Medium Shooter
  • Cerri Crakshot: CROSSBOWMAN 38 Pts, XP: 0, Quality 3+, Combat 3
    Short Move, Medium Shooter, Snowwalk
  • Slii Shadesmith: THIEF 38 Pts, XP: 3, Quality 2+ Combat 3
    Short Move, Stealth
  • Boindel Beaststrider: BEAR CAVALRY 68 Pts, XP 0 Quality 3+ Combat 4
    Mounted, Running Blow
Barbarians (513 pts):
  • Ardaric Blackmaul: BARBARIAN COMMANDER 90 Pts, XP: 0  Quality 2+, Combat 4
    Leader,  Fearless, Free Disengage, 
    [Equipment: Charmstone]
  • Ooko: ELEMENTALIST 34 Pts (+ 75 Pts Summoning pool), XP: 3 Quality 2+, Combat 1
    Elementalist, Short Move [Equipment: Healing potion]
  • Erwig Bonetooth: ELITE ARCHER 72 Pts, XP: 0 Quality 3+, Combat 4
     Fearless, Shooter (Long), Forester,  Free Disengage [Equipment: Charmstone]
  • T-ord Keenbow: ARCHER 50 Pts, XP 2 Quality 3+, Combat 3
      Fearless, Shooter (Long)
  • Remos Arcfur: WARRIOR 52 Pts, XP: 2 Quality 4+ (due to Moderate Injury), Combat 4
     Fearless, Steadfast
  • Rodulf Wolfhowl: WARRIOR 52 Pts, XP: 1 Quality 3+, Combat 4
     Fearless, Steadfast
  • Garos Bearclaw: WARRIOR 36 Pts, XP: 1 Quality 3+, Combat 3,
    Fearless
Setup:


A Warning Tower sits in the middle of the table.

Focus of the game was the top of the tower where a Barbarian was trying to light a warning beacon.

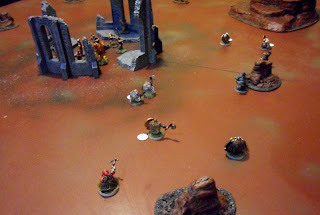
The Dwarves are massed to the West of the tower, with their ranged contingent (and the sneaky thief) to the North).

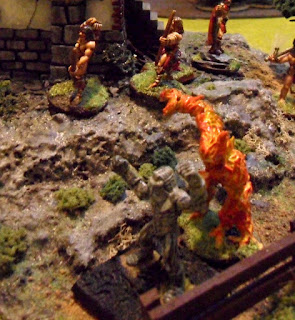
With the enemy deployed to one side the Barbarians re-arrange their defences, bringing their bowmen into face on the high ground. Ooko summons a Fire Elemental to block entrance to the path, being sure to keep within the fence line.
The Dwarves move up and Valgen calls a Shield wall group manoeuvre to repel any ranged attacks.

Ooko summons up a tough Earth Elemental to help bar the road whilst Ardaric moves round the tower base to gain line of sight to all his troops for the sake of his leadership bonus. Erwin and T-ord both take shots at the Barbarian Slayer Ireheart, but the shieldwall does it's job and he is unscathed.

Ireheart moves into combat with the Earth Elemental, atacks but is evenly matched. Manon follows in and the additional number knocks the elemental to the ground. But there is no space to take advatange so Hono flanks round to look to climb the fence. Snowbeard tries to rush in and support but only manages a modest advance and turns over the Dwarf turn. The Earth creature manages to stand up back up before it is over powered. Ooko uses his line of sight to transfix Hono and T-ord takes the moment to shoot and kill the dwarf. Erwig uses his elevated position to draw a bead on Snowbeard over the heads of the Dwarven front line and knocks him down.

Ireheart makes a power attack on the Earth Elemental, but is knocked down. Manon repeats the attack, knocking the elemental back. Snowbeard then pushes forward into the gap created to go toe-to-toe with the Fire elemental Rod Grimiron follows in making an attack and slays the Fiery Beast. With the Barbarians front defences starting to weaken (which would leave them trapped at the tower base) Valgen moves up to fence to support as the rest of his troops push forward.

But Valgen's reduced quality, due to his brain damage, mean he doesn't fight off another of Ooko's transfix spells. T-ord again takes advantage of a frozen foes and kills the Dwarven Leader. In the resulting morale checks Snowbeard and Slii back off by one movement and the Bear Cavalry fail 2 dice, taking them off the edge of the table. Erwig tries a shot at Snowbeard but misses and the Earth Elemental rolls a turnover.

Ireheart manages to get back to his feet, but also rolls an immediate turnover, handing the impetus to the Barbarians. Ookos takes advantage of the lack of opposing leader and manages to transfix Ireheart, with T-ord again backing up, shooting and killing the Barbarian Slayer. Erwig has another off shot at Snowbeard, but the rest of the force holds it's ground.

Rod starts to back away from the path to regroup. Snowbeard follows but also rolls another early turnover. This leave Rod still in range from the base of the tower, but he manages to tough out a magic and two arrow attacks.

The Dwarves warriors continue to pull back, having had enough loses, but their ranged contingient steps forward to try  to position for an attack on the ranged foes and gain a bit of pride back. Unfortunately the superior range of Erwig tells and he mows Bowtwanger down to end his battle.

The Dwarf Warriors continue to pull back pull back. Erwig tries a long range shot at Cerri Crackshot but only knocks him back further. The morale fail earlier and a successions of turnovers has left Slii the Thief exposed out in the open. Okko moves to a good view, but hasn't got enough power to cast a spell. T-ord follows round and fires a quick shot completely missing.

Cerri moves back more out of range, but Rod's retreat causes another turnover, giving the Barbarians anther crack at Slii. The dwarf can't resist a full power tranfix spell leaving him an easy target and although T-ord misses with his shot, Erwig joins him and makes no mistake - killing the dwarf as the rest of his comrades head for home.

Battle Outcome: The signal was not extinguished byt the attackers, so a Barbarina victory.

Tuesday 26 February 2013

SoBH Campaign 3 - Battle 9

Battlefield: Eagle Eyre Top
Weather: Snow
Scenario: Warmachine
Defender: Barbarians

Forces:
New additions marked in purple italics

Dwarves (496 pts):
  • Valgen Maest: DWARF COMMANDER 103 Pts, XP: 2 , Quality 2+ Combat 4
    [Brain Damaged: Combat -1 ],Short Move, Leader, Fearless, Free Disengage, Shieldwall, Snow Walk
  • Falster Vonlyr: ELITE WARRIOR 65Pts, XP: 2,  Quality 2+ Combat 4
    Short Move, Steadfast, Fearless, Free Disengage, Shieldwall
  • Halgar Snowbeard: ELITE WARRIOR 50 Pts, XP: 2, Quality 3+ Combat 4
    Short Move, Opportunistic, Snow Walk, Shieldwall
  • Ireheart: ELITE WARRIOR 40 Pts XP: 1, Quality 3+ Combat 4
    Quality 3+, Combat 4, Short Move, Lethal (vs Barbarians)
  • Manon Hardfoot: WARRIOR 48 Pts, XP: 0, Quality 3+ Combat 4
    Short Move, Shieldwall, Snowwalk
  • Rod Grimiron: WARRIOR 48 Pts, XP: 0,  Quality 3+ Combat 4
    Short Move, Shieldwall, Snowwalk
  • Hono Pickbattler: WARRIOR 48 Pts, XP: 0,  Quality 3+ Combat 4
    Short Move, Shieldwall, Snowwalk
  • Odel Bowtwanger: Novice CROSSBOWMAN 24 Pts, XP: 2, Quality 4+ Combat 3
    Short Move, Medium Shooter
  • Cerri Crakshot: CROSSBOWMAN 30 Pts, XP: 2, Quality 3+, Combat 3
    Short Move, Medium Shooter
  • Slii Shadesmith: THIEF 38 Pts, XP: 2, Quality 2+ Combat 3
    Short Move, Stealth
Barbarians (490 pts):
  • Ardaric Blackmaul: BARBARIAN COMMANDER 90 Pts, XP: 2  Quality 2+, Combat 3
    Leader,  Fearless, Free Disengage
  • Ooko: ELEMENTALIST 34 Pts (+ 75 Pts Summoning pool), XP: 2 Quality 2+, Combat 1
    Elementalist, Short Move
  • Erwig Bonetooth: ARCHER 56 Pts, XP: 2 Quality 3+, Combat 3
     Fearless, Shooter (Long), Forester,  Free Disengage
  • T-ord Keenbow: ARCHER 50 Pts, XP 1 Quality 3+, Combat 3
      Fearless, Shooter (Long)
  • Remos Arcfur: WARRIOR 52 Pts, XP: 1 Quality 3+, Combat 4
     Fearless, Steadfast
  • Rodulf Wolfhowl: WARRIOR 52 Pts, XP: 0 Quality 3+, Combat 4
     Fearless, Steadfast
  • Garos Bearclaw: WARRIOR 36 Pts, XP: 0 Quality 3+, Combat 3,
    Fearless
  • Cohan Deathaxe: VETERAN WARRIOR 30 Pts XP: 3 Quality 4+, Combat 4
    Fearless, Short Move
Setup:
Ardaric's Barbarians started in the ruins containing a valuable mortar, while the Dwarves came in from any direction. For ease of memory, the white counters are for the dwarves that have to special rule snow walk.

The Dwarves closed in from 2 directions. Ooko bolstered the defenses with a fire elemental.

Cohen Deathaxe, who was manning the mortar, fired and scored a direct hit on the Dwarf Commander,  knocking him down.

With only his pride dented, Valgen was soon up and advancing with his troops. Ooko summoned up another fire elemental as the foe closed in. Erwig loosed an arrow at Snowbeard but missed. Cohen fired the mortar again before the Dwarves got too close, but the shot drifted and missed any target.

The dwarves were now gathering in force at the entrance, using the ruin walls for cover.

Two of the Axe Brothers, Manon and Hono, moved round the side to take up a seperate flank.

Looking to halt the advance, fire balls flew from the ruins, but the only result was Slii Shadesmith being knocked down.
The dwarves were also taking fire from the windows round the other side, with Hono being knocked down by an arrow from T-ord. As it was not safe to fire the mortar anymore, Cohen abandoned it in favour for his trusty axe.

Snowbeard charged in and knocked back the Fire Elemental, clearing the path into the Barbarian camp. Rod came in behind his comrade and knocked the Barbarian Remos down. On the other side Hono stood back up from his arrow attack, but that halted the Dwarfs action. Remos regained his feet and power attcked Rod, knocking him back. Fire balls again rained in at the Dwarf attackers, but all missed. Rod also resisted a magical tranfix attack from Ooko.

The Dwarves pressed on, with Ireheart, the Barbarian Slayer, coming in to support. Snowbeard came and attacked Remos with no result. Then Rod attacked Cohen, only to be knocked down. A turnover meant that stalled the movement into the ruins, but disaster struck for the Barbarians as Ooko immediately rolled three "1"s, not only handing play back to the Dwarves but exhausting his magical powers for the rest of the battle.

Encouraged by the wailing of their foe, the Dwarves took heart. Rod stood back up a attacked Cohen, but the Old Barbarian stood firm. Snowbeard attacked Remos, slaying him. Ireheart then moved in to attack Cohen, but again the Veteran Barbarian stood his ground and knocked his assailant back. The other Dwarves moved rouns for best attack lines. First to respond was a the large Fire Elemental, but only managed to one action to move into contact with Ireheart, the other dice causing yet another immediate turnover for the Barbarians.

Snowbeard attacked joined Rod to attack Cohen. Under extra numbers the old barbarian went down. Rod finished him off. Ireheart power attacked the Fire but was knocked down. Hono and Manon had used their "extra" turns to get round to the back of the Barbarians and Hono rushed in to attack the Ardaric, with the leader being knocked back. Falester moved in and attacked the remaining Fire elemental to prevent it using its ranged attacks. Looking to take advantage of the downed Ireheart the Fire rushed in, but Ireheart still knocked the elemental to the ground. Garos then followed up, only to suffer the same fate. Erwig fired an arrow at the flanking Hono, for once his aim was off and he missed. With the Dwarves swarming in and half his force on the ground Ardaric decided to flee the battle.

Ireheart stood back up and attacked Garos. The Barbarian warrior had no chance and died. Snowbeard power attacked the downed Fire and killed it. Falster powered home an attack on the other Fire Elemental and killed it as well. Rod Attacked Remos, knocking him down, then Slii moved in an finished the job. This caused a morale test, with only T-ord failing and moving away. Manon moved up and attacked the drained Ooko, but could only knock him down. A similar result happened when Hono attacked T-ord.

The battle, however was well and truly over. An emphatic Dwarven win.

Saturday 23 February 2013

Urban War - Viridian HMG teams


Two Viridian Heavy Machine Gun teams. One standard (gunner and loader) and one older combined veteran team. I love the pose of the veteran team. It's so reminiscent of many German HMG team photos during WWII.

It wasn't until I was putting the final highlights on that I noticed that the gun for the veteran team had slipping to the side a bit, but if you don't look for it you don't notice.

Next on the table a couple of Viridian Mortar Teams...

Wednesday 20 February 2013

Urban War - Viridian Marines and HGR


Finishing off the last of my standard Colonial Marines and I've added in a Veteran Heavy Gauss Rifle (HGR) Marine as well to boost the short range fire power of the squad. I had a bit of trouble choosing a colour for his cap. I was inclined to only paint armour the light green, but the cloth brown didn't look right, so light green it became. Also painted the yellow/black stripes on the HGR to help him stand out.

Talking of fire power, next up are a Heavy Machine gun teams...

Monday 18 February 2013

Open Fire First Tanks

Took advantage of the gaming time at our local club to spend a couple of hours making a start to the tank kits in Open Fire!

Started off with the 3 German StuG III tanks.


These are the basic kits. I've not put any of the optional stowage on. Also I've not added the tank commander in the open hatch as none of the one's I have left on the sprue match the picture in the assembly guide. Again checking on the Flames of War online StuG assembly guide shows me which one to use - completely different to the picture on the included guide!

Next I moved onto the 2 Sherman Firefly kits. One of the advantages in doing the build at the club is chatting with other folk who have already experience of the box. I had been warned that the Sherman mould don't seem to line up properly, even after a good amount of filing edges down. This experience was repeated by me.


Both Fireflys had the same large gap across their fronts. The online guide seem to had avoided this, but you can see that even they have a good amount of filling needing done down the sides.


This is as far as I managed which these 2 kits. Mostly done bar the turret magnets (which are included) hatches and filling...

Next up will be the Sherman V kits - which I have been warned are much worse than the Firefly ones. Oh joy!

Tuesday 12 February 2013

Open Fire Progress


After a good few hours of work clipping, chart comparing, gluing and cursing I've finally finished the infantry sections of the Flames of War starter.

I was pre-warned by various good folk about some of the potential downfalls when doing this part. One is the fragility of the PaK40 guns. Very careful cutting is needed to get the thin barrel and supporting legs out of the sprue. Using cutters I slowly nibbled away at the joins and made the final cut with a sharp hobby knife. The guns shields are also incredibly weak and I snapped both mine across the narrow bridge (one in the sprue and the other fall apart afterwards - obviously weakened by the extraction process)

The other thing is the prone American machine gunners are an absolute pain to put together! Trying to position and attach the arms and gun caused much blue language!

So any tips? First one is be happy to use liquid poly plastic glue. being more used to metal models I was plowing on with superglue, but when I moved the Liquid Poly the pieces stuck much easier. Second (now that I've had a chance to look around the interweb is to look on the Flames of War assembly guides . I wish I'd known about these sooner, as the photos there can be more useful than the included diagrams.

I'll be sure to do both these before I start the tanks...

Friday 8 February 2013

SoBH Campaign 3 - Battle 8

Battlefield: Outside Shiverton Town
Weather: Heavy Rain
Scenario: Camp Assault
Defender: Barbarians

Forces:
New additions marked in purple italics

Dwarves (452 pts):
  • Valgen Maest: DWARF COMMANDER 95 Pts, XP: 0/7
    [Brain Damaged: Combat -1  ], Shieldwall, Snow Walk
  • Falster Vonlyr: ELITE WARRIOR 52 Pts, XP: 0/7
    Shieldwall, Snow Walk 
  • Halgar Snowbeard: ELITE WARRIOR 42 Pts, XP: 0/7
    Shieldwall, Snow Walk
  • Ireheart: ELITE WARRIOR 40 Pts XP: 0
    Quality 3+, Combat 4, Short Move, Lethal (vs Barbarians)
  • Manon Hardfoot: WARRIOR 34 Pts, XP: 2/3
    Quality 4+ [due to moderate Injury], Shieldwall
  • Rod Grimiron: WARRIOR 34 Pts, XP: 2/6
    Quality 4+ [due to moderate Injury], Shieldwall
  • Hono Pickbattler: WARRIOR 34 Pts, XP: 2/6
    Shieldwall
  • Odel Bowtwanger: Novice CROSSBOWMAN 24 Pts, XP: 1/1
  • Cerri Crakshot: CROSSBOWMAN 30 Pts, XP: 2/5
  • Slii Shadesmith: THIEF 30 Pts, XP: 1/4
    Quality 2+
Barbarians (444 pts):
  • Ardaric Blackmaul: BARBARIAN COMMANDER 90 Pts, XP: 1/7
    Quality 2+, Free Disengage [swapped with Steadfast due to foolishness on my part and easy going MacSver]
  • Ooko: ELEMENTALIST 34 Pts (+ 75 Pts Summoning pool), XP: 1/7
    Quality 2+
  • Erwig Bonetooth: ARCHER 56 Pts, XP: 1/7
    Free Disengage
  • T-ord Keenbow: ARCHER 50 Pts, XP 0
    Quality 3+, Combat 3, Shooter (Long)
  • Remos Arcfur: WARRIOR 42 Pts, XP: 0/6
    Combat 4
  • Cohan Deathaxe: VETERAN WARRIOR 30 Pts XP: 2/2

Setup:
The battlefield is set up with the edge of Shiverton in the West and a campsite in some ruins in the East.

The Barbarians start off each with a desired gemstone. Half the warband are on guard duty,, the rest are round the camp fire. Only when an enemy comes within 1 long of a guard will they be able to sound the alarm (on a quality roll) and enable the camp to activate.

The Dwarves are at the town edge. They must get the gems from defeated enemy and put them in the treasure chest to get a victory point.

The Dwarves activated first, but with the conditions slippery all bar one managed to rush out and end up on their backs.

Two Barbarians moved over to guard the pass.

A Line of dwarves rushed into the pass. T-ord sounded the alarm then he and Cohan rushed back to the camp rather than be caught out in the open (although Cohen only just made it). Ooko make some arcane hand gestures and the flames of one of the fires came to life.

Valgen's force started to move up to their foe. The main force pushing a direct route though the gap, and the ranged warriors flanking round, maybe hoping to get a pot shot at Remos. Valgen calls for a Shiled wall formation to protect the front troops until the reinforcements arrive.

Seeing the numbers coming towards them and with the weather hampering the effectiveness of their long bow range the Barbarians decided to seek a better defensive position, and headed for some woods. Ooko summoned a second Fire Elemental to help fight the rearguard.

As the humans started to move away, so the dwarves try to follow round the rock, but an early turnover halts their progress.

But with a bit of a mad dash (and some slipping) Ardarics warriors were getting towards their new standing ground...

and a quick turn over let them get their Archers into position at the edge of the woods, giving them an advantageous ambush position.

Valgen, leading the line, had now arrived at the camp to find it empty. He turns his gaze towards the woods and his warriors followed up.

Cerri Crackshot stepped forward to get within crossbow range, but slipped and fell in the mud. This gave the Fire Elemental the chance to capitalise, which it did as it rushed out, killed the dwarf with a normal attack and then retreated back to it's defensive position. Ooko also took inspiration from the climatic conditions and summoned up a water elemental in the rain.

Looking around him Valgen saw his force slowly take shape. The occasional slip to the ground was slowing the formation before looking to make a rush forward as they had in the previous battle.

But when he looked back forward he saw the Elemental Wall between him and the defensively positioned Barbarians (and more importantly the gems).

The dwarf line was finally formed, but the enemy were still out of easy reach to try and engage. The treacherous underfoot conditions made charging across the divide even more dangerous, as the still warm body of Cerri demonstrated. Sighing, the warlord realised that the slippy terrain could leave his dwarves exposed and, with the Barbarians happy to wait for their attackers, decided that he'd have to seek his riches another way. And so they retreated back into the rain.

Battle Outcome: With the only kill and all the gems the Barbarians win.