
This is a quick description of my scenics project to use Juwel Aquarium scenics structured background to make some quick and easy cavern/tunnel walls for wargaming.
Juwel make a 3d plastic/foam background for aquariums. I picked up a sheet of their STR600 - a 60cm x 50 cm sheet from my local Pets-at-Home superstore. Unfortunately this product seems to be impossible to find over in the US .
Here are a couple pictures of the material before any work is done to them. (with a 28mm Foundry Gladiator for scale)


First I have to say that I had a few criteria I had to consider for this project.
- Value for money - my hobby budget is pretty limited, so I need to get something as cost effective and versitile as possible.
- Quick and easy - like my budget my hobby time is very limited (as is my skill!)
- Easy Storage - Very little room in the house means it must be flexible and easy.
The best looking way to create the tunnel system would be to construct some modular sections, but the design and construction time with the storage problem of this solution ruled this out. I decided to go with free standing walls and use something seperate as flooring. The back of the sheeting (NB: only on the STR400 and STR600 versions) is split into one inch squares for ease of cutting to size. I chose to make my walls 2 inches high - tall enough to make it look the job but short enough to maximise the langth of wall I would finally have (8 metres in this case). The sheets are make of some sort of expanded foam on the inside and no too thick, so a couple of cuts with a sharp DIY knife easily cut through. I then cut the long wall lengths into random lengths (for variety and laziness), trying to only cut along the highest profile for joining finished walls later.(see pictures below for height example and wall depth profile)


To my joy I found that the walls were thick enough to happily stand on their own - so no need to attach to a base -BONUS!
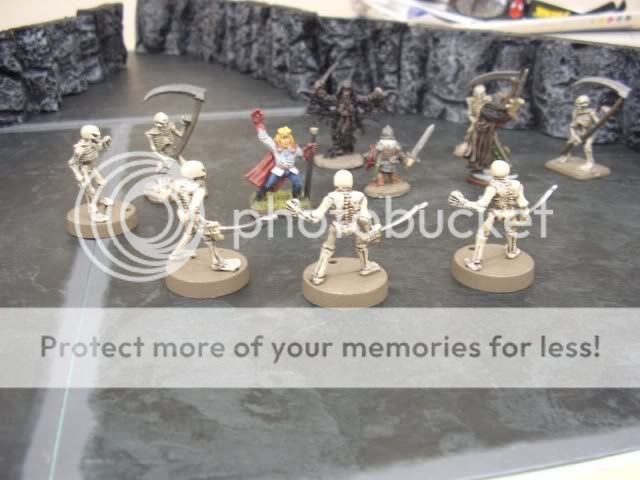
Next task was a bit of painting. Using a small section of wall for testing I applied some cheap black spray as a base coat, hoping that the aerosol wouldn't eat the foam. Happily it didn't so I applied a black base coat and when dry and 2 dry brushed coats - first mid grey and the second a light gray. For the tunnel/cavern floor I bought some cheap slate effect vinyl floor tiles. They unfortunately have a light grey edging which I should do something with sometime, but they will do for now (and are extremely easy to store!). Below are a couple of pictures to give you the idea of what they turned out like.

some good ideas there.
ReplyDeletea true #oldhammer fanatic will use whatever he or she can get to create scenery.